0. Outline
1. ROS1과 Camera 연동, Workspace 설정하기
외장 UVC-Camera를 연결하여 설정하였습니다.
DRGO WC720 카메라입니다.
1.1. roscore 실행
$ roscore
Shell
복사
1.2. uvc-camera 연동
새 터미널을 열어 다음 라이브러리를 설치합니다.
$ sudo apt install ros-melodic-uvc-camera
Shell
복사
아래 명령어를 통해 uvc-camera-node를 실행합니다.
•
_skip_frames:=5 옵션을 통해 6프레임 중 5프레임을 쉬고 1프레임을 전송 (default=0)
$ rosrun uvc_camera uvc_camera_node _skip_frames:=5
Shell
복사
아래 명령을 통해 카메라의 영상을 확인합니다.
$ rosrun image_view image_view image:=image_raw
Shell
복사
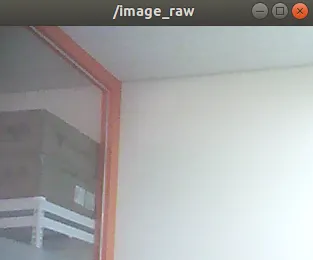
프레임을 강제로 낮췄기에 끊기는게 정상입니다.
1.3. ROS topic flow 확인
$ rqt_graph
Shell
복사
위 명령어를 통해 ros topic의 흐름에 대해 볼 수 있습니다.

ros의 topic에 대한 내용은 다음 포스팅을 참고해주세요.

1.4. 본격적인 ROS Workspace Setting
Workspace 폴더 생성 및 setup.bash를 실행합니다.
$ mkdir ros_workspace
$ cd ros_workspace
$ source /opt/ros/melodic/setup.bash
Shell
복사
catkin Workspace을 생성합니다.
catkin Workspace에 대한 자세한 내용은 밑 링크를 참고하세요.

$ mkdir -p src/
$ cd src/
$ catkin_init_workspace
Creating symlink "/home/kkim/ros_workspace/CMakeLists.txt" pointing to "/opt/ros/melodic/share/catkin/cmake/toplevel.cmake"
Shell
복사
이후 catkin_make를 통해 작업공간을 빌드?합니다.
$ catkin_make
Shell
복사
만약 The specified base path "/home/kkim/ros_workspace" contains a CMakeLists.txt but "catkin_make" must be invoked in the root of workspace 오류가 발생한다면 아래 링크처럼 해결하세요.

unlink CMakeLists.txt
catkin_make 명령어가 실행됬다면 다음 명령어를 통해 작업공간을 셋업합니다.
$ source devel/setup.bash
Shell
복사
2. YOLOv5 - ros 패키지 기능 구현하기
먼저 yolov5_ros 패키지를 생성합니다.
$ catkin_create_pkg yolov5_ros rospy roscpp std_msgs sensor_msgs message_generation
Shell
복사
catkin_create_pkg 명령어의 첫 번째 인자는 생성되는 패키지 명을 의미합니다.
두번째에 들어가는 rospy, roscpp 등은 옵션으로, 패키지에서 필요한 dependency들을 리스팅한 것입니다.
yolov5_ros의 src 폴더로 이동하여 yolov5를 다운로드받습니다.
$ cd yolov5_ros/src
$ git clone https://github.com/ultralytics/yolov5
Shell
복사
다음 명령어를 통해 설치하면 됩니다.
다만 PyYAML은 오류가 발생하니 따로 설치합니다.
$ cd yolov5
$ pip3 install --ignore-installed PyYAML
$ pip3 install -r requirements.txt
Shell
복사
이제 Object Detection 결과를 전송하기 위한 message를 정의하기 위해 msg 폴더를 생성합니다.
$ cd ~/ros_workspace/row_ws/src/yolov5_ros
$ mkdir msg
Shell
복사
메세지를 다운로드하여 폴더에 저장합니다.
$ cd msg
$ wget https://raw.githubusercontent.com/raghavauppuluri13/yolov5_pytorch_ros/master/msg/BoundingBox.msg
$ wget https://raw.githubusercontent.com/raghavauppuluri13/yolov5_pytorch_ros/master/msg/BoundingBoxes.msg
Shell
복사
이제 CMakeLists.txt에 다음 내용을 추가합니다.
$ cd ~/ros_workspace/src/yolov5_ros
$ vim CMakeLists.txt
################################################
## Declare ROS messages, services and actions ##
################################################
# 밑에 추가해주세요. 31번째 줄 즈음입니다.
add_message_files(
FILES
BoundingBox.msg
BoundingBoxes.msg
)
generate_messages(
DEPENDENCIES
geometry_msgs
sensor_msgs
std_msgs
)
$ cd ~/ros_workspace
$ catkin_make
Shell
복사
~/ros_workspace/src/yolov5_ros/src에 detect.py 파일을 생성합니다.
#!/usr/bin/env python3
# https://github.com/mats-robotics/yolov5_ros/blob/main/src/detect.py를 일부 수정하였습니다.
# ------------------------------------------------------------------------------
# - import
# ------------------------------------------------------------------------------
# : importing system libraries
import sys
import os
import time
# : importing externel libraries
import rospy
import numpy
import torch
import torch.backends.cudnn as cudnn
# : importing - from
from pathlib import Path
from sensor_msgs.msg import Image
from yolov5_ros.msg import BoundingBox, BoundingBoxes
# : importing - yolov5
# FILE : 현재 파일의 경로
# Path(__file__) : 현재 파일의 구상 경로를 인스턴스화
# resolve() : 절대경로 반환
# - result : /home/kkim/ros_workspace/src/yolov5_ros/src/detect.py
FILE = Path(__file__).resolve()
# ROOT : yolov5 폴더의 경로
# - yolov5 폴더의 path를 구한 뒤 sys.path에 append하여 import 가능하도록 설정
ROOT = FILE.parents[0] / "yolov5"
if str(ROOT) not in sys.path:
sys.path.append(str(ROOT))
# - 상대 경로로 변환
ROOT = Path(os.path.relpath(ROOT, Path.cwd()))
# main importing
from models.common import DetectMultiBackend
from utils.general import (
check_img_size,
non_max_suppression,
scale_boxes)
from utils.torch_utils import select_device
from utils.augmentations import letterbox
# ------------------------------------------------------------------------------
# - defines
# ------------------------------------------------------------------------------
IMG_W = 640
IMG_H = 480
# ------------------------------------------------------------------------------
# - class : Yolov5Detector
# ------------------------------------------------------------------------------
def param(_name, _value):
return rospy.get_param(_name, _value)
class Yolov5Detector:
def __init__(self):
# print("Yolov5 __init__")
# get rospy parameters
self.cnf_thr = param("~confidence_threshold", 0.75)
self.iou_thr = param("~iou_threshold", 0.45)
self.agn_nms = param("~agnostic_nms", True)
self.max_det = param("~maximum_detections", 1000)
self.classes = param("~classes", None)
self.dnn = param("~dnn", True)
# initialize weights
self.weight = param("~weights", "yolov5s.pt")
# initialize model
self.device = select_device(str(param("~device", "cpu")))
self.model = DetectMultiBackend(
self.weight,
device = self.device,
dnn = self.dnn)
model = self.model
_, self.stride, self.names, self.pt, self.jit, self.onnx, self.engine = (None,
model.stride, model.names, model.pt, model.jit, model.onnx, model.engine)
# setting inference size
self.img_siz = [ param("~inference_size_w", IMG_W),
param("~inference_size_h", IMG_H) ]
self.img_siz = check_img_size(self.img_siz, s=self.stride)
# half
self.half = param("~half", False)
self.half &= ( self.pt or
self.jit or
self.onnx or
self.engine) and self.device.type != "cpu"
if self.pt or self.jit:
self.model.model.half() if self.half else self.model.model.float()
batch_size = 1
# set True to speed up constant image size inference
cudnn.benchmark = True
self.model.warmup(imgsz=(1 if self.pt else batch_size, 3, *self.img_siz))
# initialize subscriber to image topic
rospy.Subscriber('/image_raw', Image, self.callback)
self.pre_pub = rospy.Publisher(
rospy.get_param("~output_topic", "/yolov5_ros"),
BoundingBoxes,
queue_size=10)
def callback(self, _img_msg):
# print("Yolov5 callback")
typ = numpy.dtype("uint8")
typ = typ.newbyteorder('>' if _img_msg.is_bigendian else '<')
img_cv = numpy.ndarray(
shape=(
_img_msg.height,
_img_msg.width,
3),
dtype=typ,
buffer=_img_msg.data)
if _img_msg.is_bigendian == (sys.byteorder == 'little'):
img_cv = img_cv.byteswap().newbyteorder()
img, img_0 = self.preprocess(img_cv)
img = torch.from_numpy(img)
img = img.half() if self.half else img.float()
img /= 255
if len(img.shape) == 3:
img = img[None]
pre = self.model(img, augment=False, visualize=False)
pre = non_max_suppression(pre,
self.cnf_thr,
self.iou_thr,
self.classes,
max_det = self.max_det)
det = pre[0].cpu().numpy()
box = BoundingBoxes()
box.header = _img_msg.header
box.image_header= _img_msg.header
if len(det):
det[:, :4] = scale_boxes(img.shape[2:],
det[:, :4],
img_0.shape).round()
for *xyxy, conf, cls in reversed(det):
c = int(cls)
box_msg = BoundingBox()
box_msg.Class = self.names[c]
box_msg.probability = conf
box_msg.xmin = int(xyxy[0])
box_msg.ymin = int(xyxy[1])
box_msg.xmax = int(xyxy[2])
box_msg.ymax = int(xyxy[3])
box.bounding_boxes.append(box_msg)
self.pre_pub.publish(box)
def preprocess(self, _img):
_cpy = _img.copy()
_img = numpy.array(
[letterbox(
_img,
self.img_siz,
stride=self.stride,
auto=self.pt)[0]])
_img = _img[..., ::-1].transpose((0, 3, 1, 2))
_img = numpy.ascontiguousarray(_img)
return _img, _cpy
if __name__ == "__main__":
# print("MAIN start")
rospy.init_node("yolov5", anonymous=True)
detector = Yolov5Detector()
rospy.spin()
Python
복사
파일을 작성한 뒤 실행 권한을 부여해야 합니다.
$ cd ~/ros_workspace/src/yolov5_ros/src
$ chmod +x detect.py
Shell
복사
실행 권한 이후에 catkin_make에 등록합니다.
$ cd ~/ros_workspace/src/yolov5_ros
$ vim CMakeLists.txt
#############
## Install ##
#############
# ...
# 밑에 추가해주세요.
catkin_install_python(PROGRAMS
src/detect.py
DESTINATION ${CATKIN_PACKAGE_BIN_DESTINATION}
)
Shell
복사
이제 실행하겠습니다.
$ cd ~/ros_workspace
$ catkin_make
$ source devel/setup.bash
$ rosrun yolov5_ros detect.py
Shell
복사

roscore 등의 명령어로 ROS를 실행하는 걸 잊지 마세요.
2.1. Topic 흐름 확인하기
$ rqt_graph
Shell
복사
3. robot_ctrl 패키지 기능 구현하기
/uvc_camera node와 /yolov5_ros node의 정보를 받아서 로봇을 제어하는 패키지를 만듭니다.
구체적인 액션을 주지 않고, 수신 확인만 동작하도록 작성하겠습니다.
먼저 robot_ctrl 패키지를 생성합니다. yolov5 패키지와 비슷해요!
$ cd ~/ros_workspace/src
$ catkin_create_pkg robot_ctrl rospy roscpp std_msgs sensor_msgs yolov5_ros
Shell
복사
~/ros_workspace/src/robot_ctrl/src에 control.py를 생성합니다.
#!/usr/bin/env python3
# ------------------------------------------------------------------------------
# - import
# ------------------------------------------------------------------------------
# : importing system libraries
import sys
# : importing externel libraries
import numpy
import cv2
import rospy
import message_filter
# : importing - from
from sensor_msgs.msg import Image
from yolov5_ros.msg import BoundingBoxes
# ------------------------------------------------------------------------------
# - class: robotctrl
# ------------------------------------------------------------------------------
class RobotControl:
def __init__(self):
img_cb = message_filter.Subscriber('/image_raw', Image)
yolov5 = message_filter.Subscriber('/yolov5_ros', BoundingBoxes)
timsyn = message_filter.TimeSynchronizer([img_cb, yolov5], 10)
timsyn.registerCallback(self.callback)
def callback(self, _img_msg, _box_msg):
typ = numpy.dtype("uint8")
typ = typ.newbyteorder('>' if _img_msg.is_bigendian else '<')
img = numpy.ndarray(
shape =( _img_msg.height,
_img_msg.width,
3),
dtype =typ,
buffer=_img_msg.data)
if _img_msg.is_bigendian == (sys.byteorder == 'little'):
img = img.byteswap().newbyteorder()
img = cv2.cvtColor(img, cv2.COLOR_BGR2RGB)
for box in _box_msg.bounding_boxes:
print(box)
cv2.rectangle(
img,
(box.xmin, box.ymin),
(box.xmax, box.ymax),
(255, 0, 0),
2)
cv2.imwrite('tmp.jpg', img)
if __name__ == "__main__":
rospy.init_node("robot_control", anonymous=True)
control = RobotControl()
rospy.spin()
Shell
복사
마찬가지로 실행 권한 부여하고 catkin_make에 등록해주세요.
$ cd ~/ros_workspace/src/robot_ctrl/src
$ chmod +x control.py
Shell
복사
$ cd ~/ros_workspace/src/robot_ctrl
$ vim CMakeLists.txt
#############
## Install ##
#############
# ...
# 밑에 추가해주세요.
catkin_install_python(PROGRAMS
src/control.py
DESTINATION ${CATKIN_PACKAGE_BIN_DESTINATION}
)
Shell
복사
이제 실행하겠습니다.
$ cd ~/ros_workspace
$ catkin_make
$ source devel/setup.bash
$ rosrun yolov5_ros control.py
Shell
복사
이렇게 실행하면, ~/ros_workspace 안에 tmp.jpg가 생성됩니다.
이미지 내에는 detection 된 물체의 box도 그려져 있습니다.
4. 원활한 실행을 위해 흐름 이해하기

rqt_graph 명령어를 통해 얻은 실행 플로우
•
ROS 실행
1.
ros를 실행한다.
$ roscore
Shell
복사
•
카메라 실행
1.
카메라를 연결한다
2.
vmware의 설정을 통해 /dev/에 videoN이 뜨는지 확인한다.
$ ls /dev/video*
Shell
복사
3.
다음 명령어를 통해 캠을 uvc-camera-node를 통해 image_raw topic으로 송출한다.
$ rosrun uvc_camera uvc_camera_node _skip_frames:=5
$ rosrun image_view image_view image:=image_raw
Shell
복사
•
build(?)
1.
다음 명령어를 실행하여 yolov5와 robot control을 실행한다.
$ cd ~/ros_workspace
$ catkin_make
$ source devel/setup.bash
Shell
복사
•
yolov5 & robot_ctrl 실행
1.
yolov5을 실행한다.
$ rosrun yolov5_ros detect.py
Shell
복사
2.
robot_ctrl을 실행한다.
$ rosrun robot_ctrl control.py
Shell
복사
roscore, image_view, yolov5_ros, robot_ctrl 4가지는 각각의 탭에서 실행되야합니다.